Do I need a concrete base for a raised pond?
A Concrete base should only be considered if the ground you are building your raised pond on is very soft and riddled with roots. A solid base is vital to ensure your raised pond will not sink when it rains.

Table of Contents
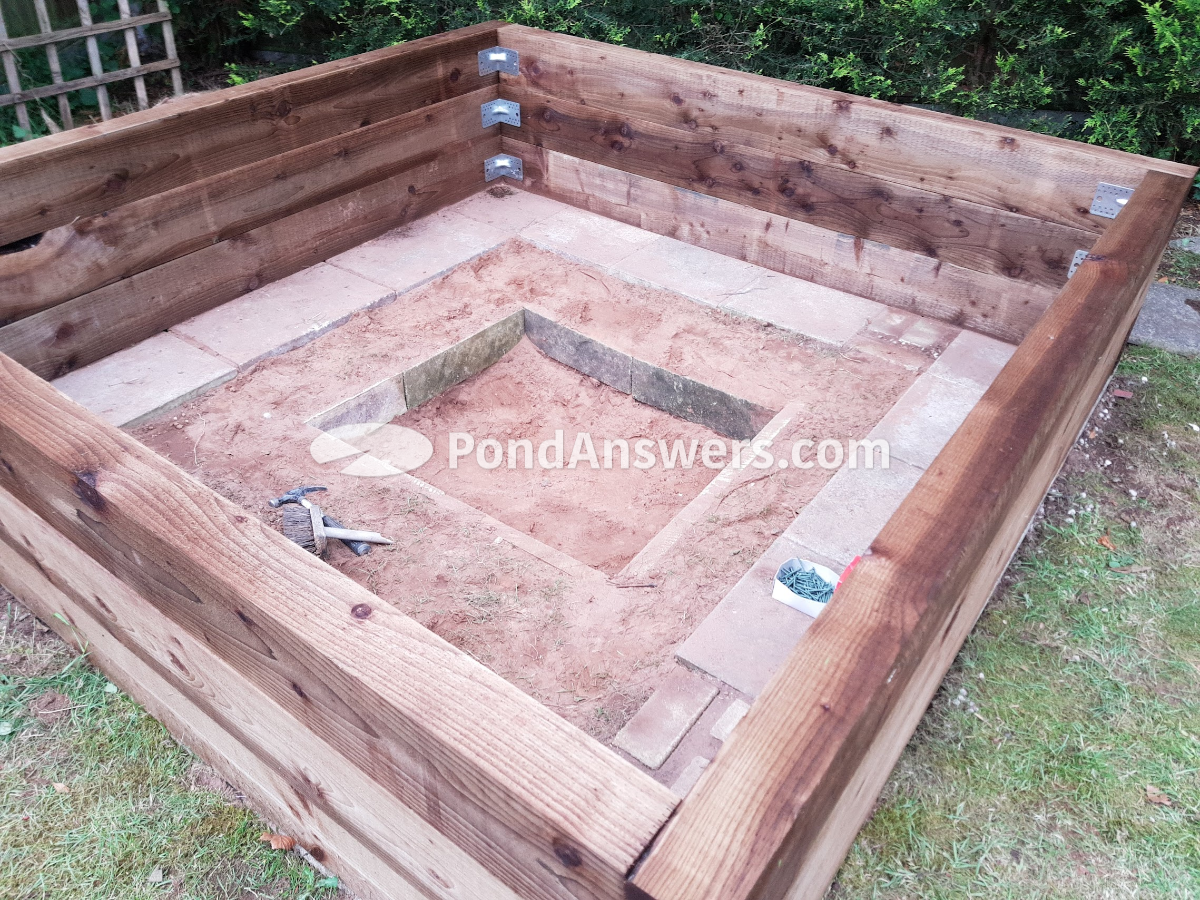
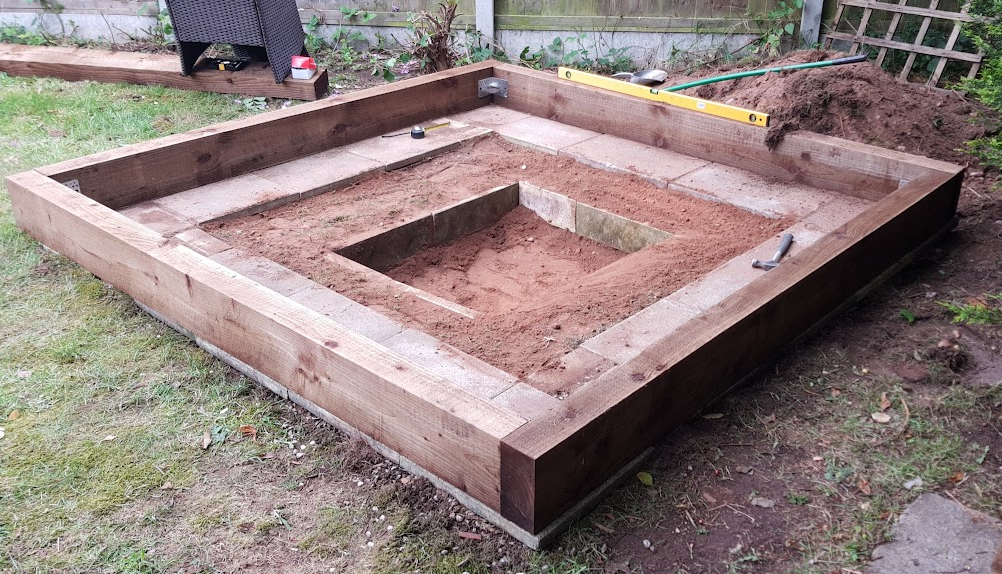
As you can see from the image below (that’s my pond midway through building), the wooden railway sleepers are seated on standard paving slabs. The paving slabs not only protect the sleepers from becoming damaged due to wet soil, but allowed me ensure the sleepers are level – so concrete was not required.
If you’re thinking about adding a raised pond to your garden, you may be wondering if you need a concrete base. Raised ponds can be a beautiful and unique addition to any outdoor space, but it’s important to ensure that they’re built on a solid foundation to avoid any potential problems down the line. In this article, i’ll answer some common questions you may have about building a raised pond and whether a concrete base is hard requirement.
What is a Raised Pond?
A raised pond is a type of garden pond that is built above ground level, rather than dug into the ground. They can be made from a variety of materials, including wood, stone, brick, and concrete blocks. Raised ponds can be any size or shape, and can be built to fit into any garden shape or outdoor space.
Why Choose a Raised Pond Over an In-Ground Pond?
Raised ponds offer several advantages over in-ground ponds. One of the primary reasons is that they can be built in any location, regardless of the soil conditions. This makes them a great option for gardens with poor soil or areas with a high water table. Compared to traditional “in ground” ponds, raised ponds can be easier to maintain (no need to bend down)
Can I Build a Raised Pond on Any Type of Surface?
While a raised pond can be built on any type of surface, it’s important to ensure that the surface is level and stable. A level surface will prevent the water in the pond from shifting, which can cause leaks or other issues. Additionally, if the surface is not stable, the weight of the pond and water can cause it to shift or collapse over time. If you’re building a raised pond on a sloped surface, you will need to level the area before beginning construction.
What is the Purpose of a Concrete Base for a Raised Pond?
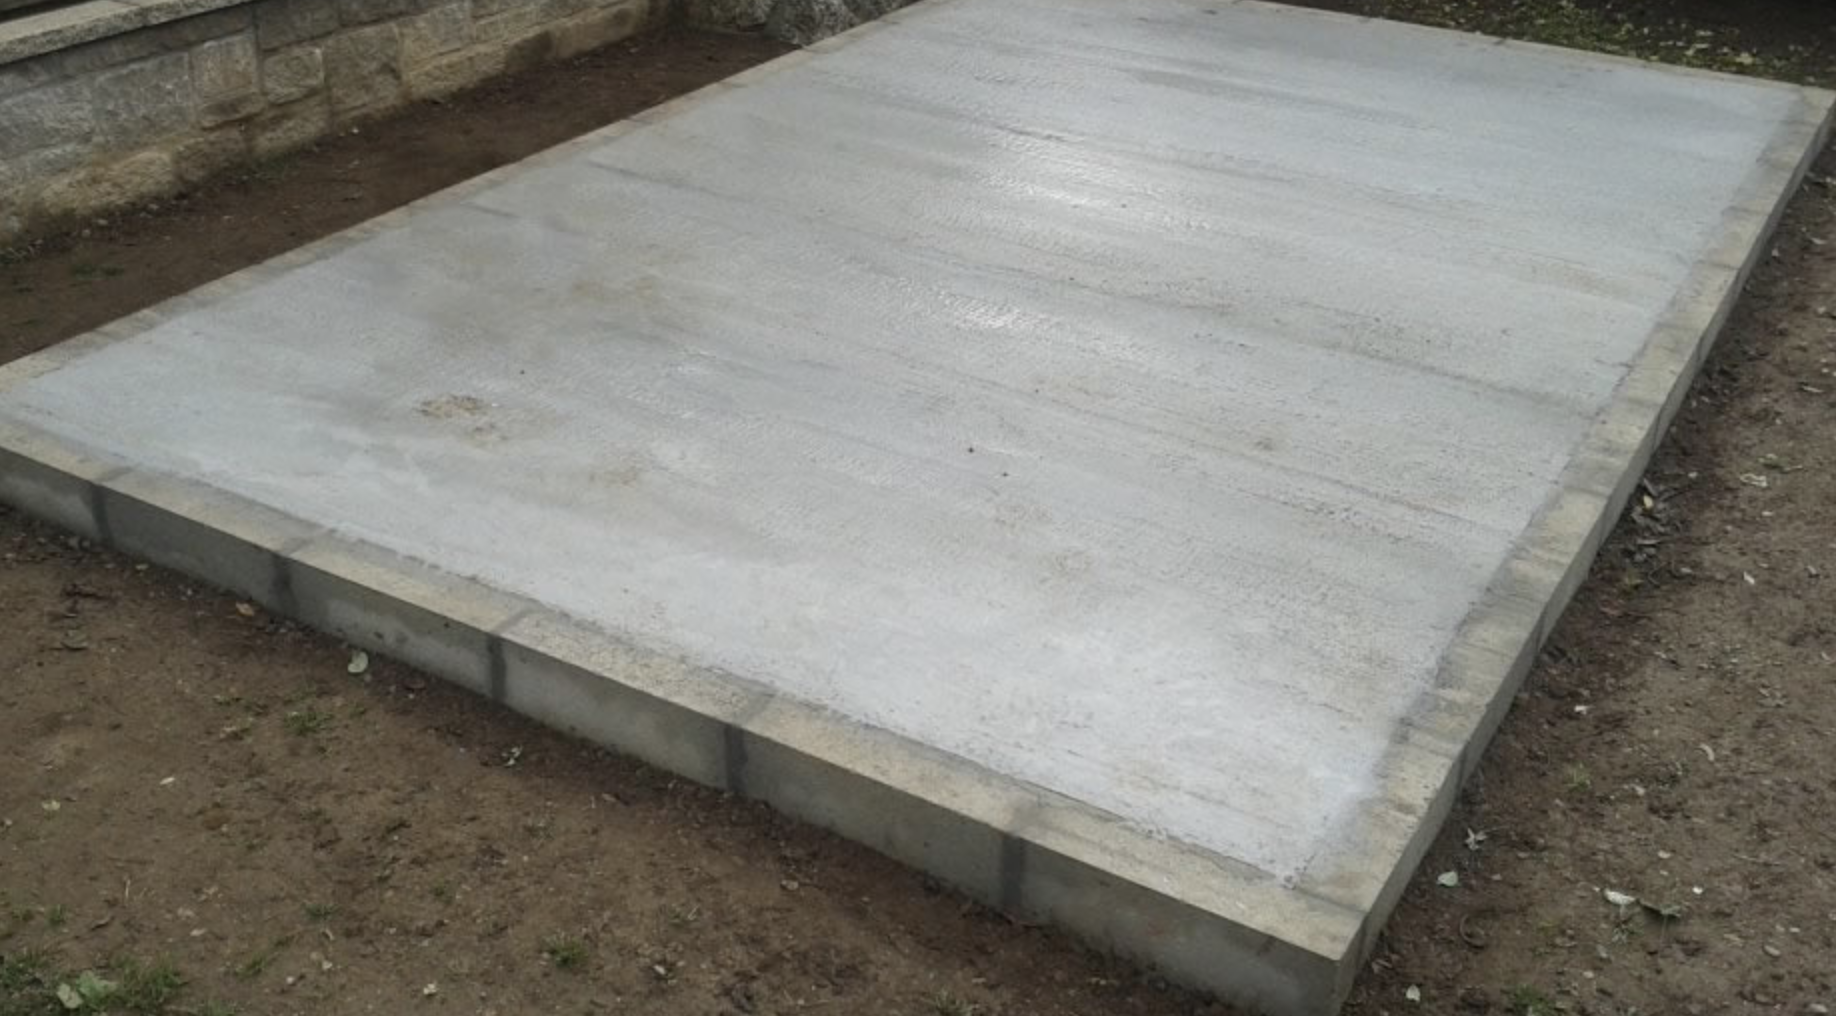
A concrete base is a popular option for the foundation of a raised pond because it provides a stable and level surface for the pond to sit on. The purpose of the base is to ensure that the pond sits level and does not shift or settle over time – especially when the ground becomes wet with rain/snow. Concrete pond bases can help to prevent water from seeping out of the pond and into the ground below. This can help to reduce the risk of damage to nearby structures or landscaping.
Do I Need to Use Concrete for the Base of a Raised Pond?
While a concrete base is a popular option for the foundation of a raised pond, it’s not the only option. You can also use other materials, such as paving slabs, bricks, or cinder blocks, to create a stable base for your pond. When choosing a material for your base, it’s important to consider the weight of the pond and the water it will contain, as well as the stability of the surface you’ll be building on.
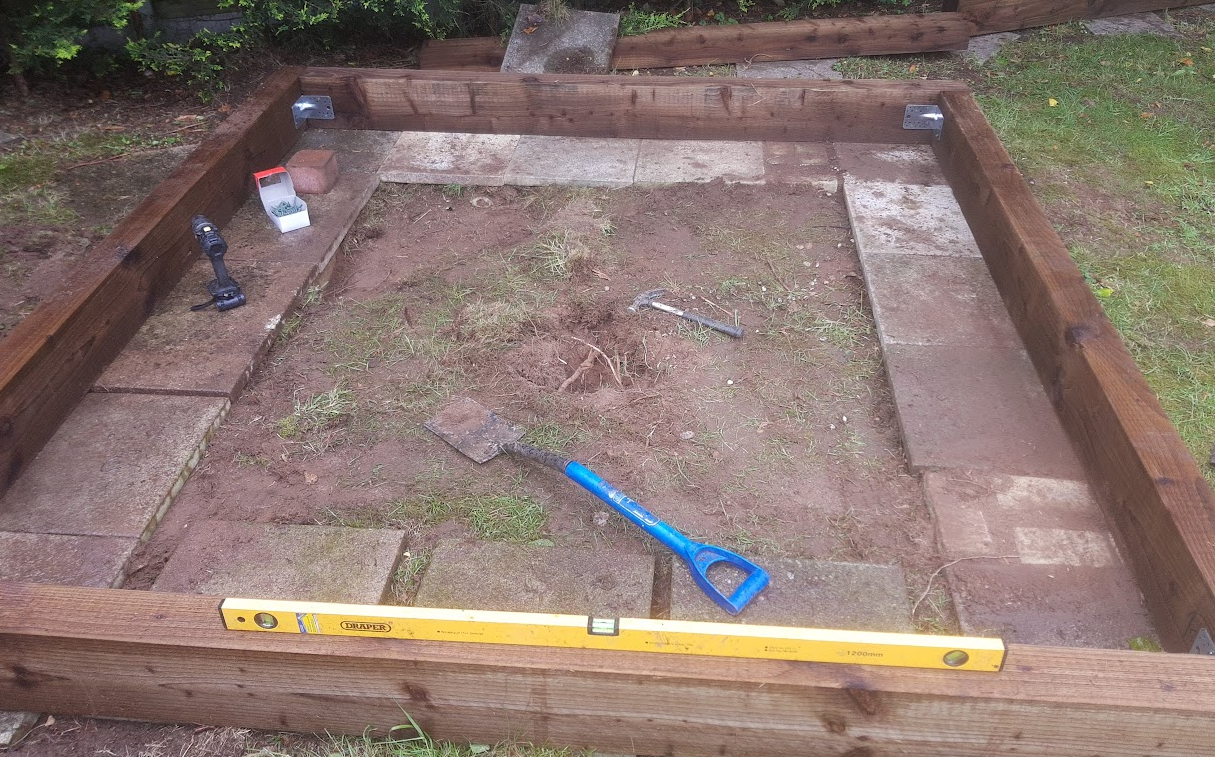
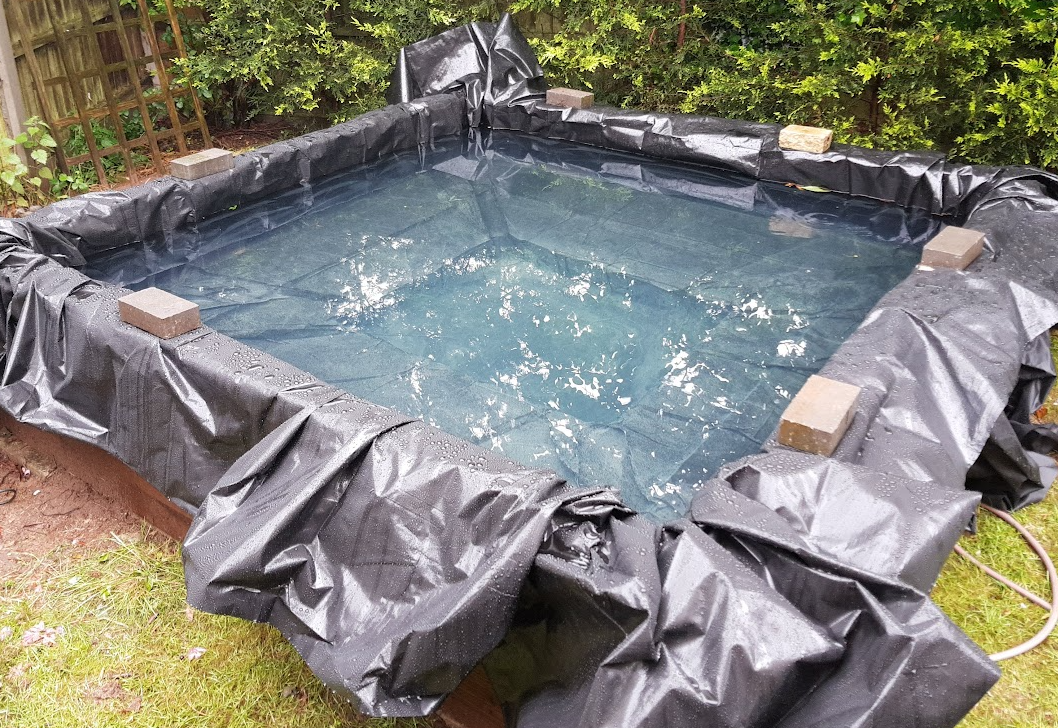
Concrete is not the only base you can use for your raised pond. As you can see from the image above, I used some old paving slabs for my sleeper pond which has been absolutely fine for my 2.4m x 2.4m pond.
Other suitable materials:
- Paving Slabs
- Block Paving Bricks
- Compacted Gravel
- Breeze Blocks
Do not use any materials that will decay with water such as wood.
How Thick Should the Concrete Base Be for a Raised Pond?
The thickness of the concrete base for your raised pond will depend on the size of the pond and the weight it will contain. As a general rule, the concrete should be at least 2-4 inches thick for smaller ponds, and up to 6 inches or more for larger ponds. It’s important to ensure that the base is thick enough to support the weight of the pond and water, and to prevent it from cracking or sinking over time.
How Do I Properly Prepare the Site for a Raised Pond with a Concrete Base?
Before you begin building your raised pond with a concrete base, it’s important to properly prepare the site.
- Start by marking out the area where you want the pond to be located
- Ensure the ground is is level and stable.
- Clear away any debris or vegetation from the site
- Dig down to a level that w to the desired depth for your base (including hardcore & sand).
- Add hardcore / sand and compress
- Add your concrete possibly ensuring it fully sets before walking on it.
What Are the Pros and Cons of Having a Raised Pond with a Concrete Base?
There are several pros and cons to consider when building a raised pond with a concrete base. On the plus side, a concrete base provides a stable and level surface for the pond to sit on, and can help to prevent water from seeping out of the pond and into the ground below. Additionally, concrete is a durable and long-lasting material that can withstand the weight of the pond and water over time.
Concrete (or slabs) pond bases can also prevent rats from damaging your pond, preventing them from digging underneath your liner.
On the downside, building a concrete base can be more labour-intensive and expensive than using other materials. Additionally, concrete can be prone to cracking or settling over time, especially if it’s not poured correctly or if the ground underneath it shifts or settles.
How to Build a Raised Garden Pond
When building my own raised pond, I went into it quite blind. I knew the dimensions, location and the size I wanted. I have prepared a little guide below to help you with building your very own raised pond.
Choose the location and size
Pick a spot in your garden that receives adequate sunlight and is relatively flat. Make sure the location is accessible for construction and maintenance. Determine the size and shape of your pond according to your preference and the available space.
For example, I was able to purchase 2.4m railways sleepers which made my pond a 2.4m square pond without any additional cutting required.
Gather materials and tools:
You will need the following materials and tools for building a raised garden pond:
- Pond liner (EPDM or PVC)
- Pond underlay or old carpet
- Concrete blocks, bricks, or timber sleepers (for the pond walls)
- Sand or fine gravel (for the pond base)
- Pond pump and filter system
- Pond plants and ornaments (optional)
- Shovel, spade, or Mini-Digger (for digging)
- Spirit level
- Hammer and nails or screws (for sleeper ponds)
- Concrete mix (for concrete block construction)
- Mortar mix and trowel (for brick construction)
- Saw or circular saw (for cutting the railway sleepers)
- Tape measure
- String and pegs (to mark the outline)
Mark the outline
Using string and pegs, mark the outline of your raised pond. Make sure the dimensions are accurate and the shape is symmetrical.
Prepare the base:
Dig out about 4-6 inches (10cm-15cm) of soil within the marked outline to create a level base for your pond. Ensure the base is flat and even using a spirit level.
Build the raised pond walls:
Depending on the material you choose, build the walls of your pond using one of the following methods:
Concrete blocks
Lay the blocks in a staggered pattern, filling the gaps with concrete mix. Make sure each layer is level and continue building until the desired height is reached.
Bricks
Lay the bricks using mortar, staggering the joints for added strength. Ensure each layer is level and build to the desired height.
Railway Sleepers
Cut the sleepers to size and join them using screws or nails, creating a box frame. Ensure the frame is square and level.
Add underlay and pond liner
Place the pond underlay or old carpet on the base and up the sides of the pond walls to protect the liner from punctures. Then, drape the pond liner over the walls and base, allowing for some excess to extend over the top of the walls.
Secure the liner
Using bricks, stones, or timber edging, secure the pond liner along the top edge of the pond walls, ensuring it's tight and as wrinkle/crease free as possible.
Fill with water and install the pump and filter

Fill the pond with water, making sure the liner is evenly stretched and settled. Install the pond pump and filter system according to the manufacturer's instructions.
Add sand or gravel (Optional):
Spread a layer of sand or fine gravel over the bottom of the pond to protect the liner and create a natural-looking base.
Landscape and add plants:
Finish landscaping around the pond with stones, plants, and other garden features. Add pond plants and ornaments if desired but making sure that you have easy access to your filter boxes.
Monitor and maintain:
Keep an eye on your pond for any issues such as leaks, debris, or algae growth. Perform regular maintenance to keep your raised garden pond in good condition.
Conclusion
In conclusion, if you’re thinking about building a raised pond in your garden, a concrete base can provide a stable and level foundation for your pond. However, it’s not the only option, and you can use other materials to create a strong and stable base for your pond as well.
Make sure to properly prepare the site before building, and choose a material that’s strong enough to support the weight of the pond and water. With a solid foundation, your raised pond can be a beautiful and enjoyable addition to your outdoor space for years to come.